Disclosure : This post may contain affiliate links or paid partnerships. I may earn compensation if you click a link or make a purchase, at no additional cost to you. See my disclosure for more info.
Indoor plants are having a moment — and so is the desire to display them beautifully.
You’ve got the plants. The lush fiddle leaf that needed to come home with you. The trailing pothos that does its cascading thing. The little succulent collection that started as three and quietly became seven.
What you might not have yet is a great way to show them off.
Right now they’re probably on the floor, lined up against the wall. Or jammed onto the windowsill between whatever else landed there. Or balanced on a stack of books that wobble slightly when you walk past.
None of those situations do your plants — or your room — justice.
The solution is a plant stand. Something that lifts your greenery to the right height, gives it presence, and makes it feel like a deliberate design choice rather than an afterthought.
But plant stands at retail prices are honestly a bit much. Fifty to a hundred dollars for some wood and metal feels steep when you can achieve the same result — often with more personality — by making something yourself.
These twenty-one DIY ideas range from genuinely simple to pleasantly creative. All of them look great. All of them cost far less than anything in a furniture store.
Let’s walk through them.
1. The Upcycled Stool Plant Stand
Your local thrift store almost certainly has a small wooden stool sitting somewhere on a shelf, priced at a few dollars.
Grab one. Sand away any rough patches. Give it a fresh coat of paint — matte is generally the most forgiving — and let it dry completely.
Your upcycled plant stand is ready.
The great thing about this approach is that slightly imperfect paint jobs and visible wear from the stool’s past life actually add to the charm rather than detracting from it. Rustic and imperfect beats pristine and generic every time.
2. The Three-Legged Copper Pipe Stand
Head to the plumbing aisle of any hardware store. You need three short copper pipe lengths and three copper elbow joints.
Pick up a small round wood disc from a craft store to serve as the top surface.
Join the three pipes at the elbows to form a tripod base. Glue the disc on top. Allow adhesive to cure overnight.
The warm, reddish copper tone looks beautiful alongside green foliage and works in nearly any interior style — industrial, bohemian, Scandinavian, and mid-century all embrace copper equally well.
3. The Easy Hairpin Leg Plant Table
Hairpin legs are one of the most versatile furniture components you can buy online. They’re inexpensive and come with pre-drilled mounting holes.
Buy a set of four. Purchase or cut a round wood blank. Attach the legs using the provided screws. Sand any rough edges and apply your preferred finish.
You’ve just built a proper mid-century style plant stand for somewhere between ten and fifteen dollars.
Add a coat of dark walnut stain to the wood top and the contrast against the metal legs is genuinely excellent.
4. The Tiered Wooden Crate Display
Collect two or three small wooden crates — craft stores sell them new, or you can find them secondhand.
Stand them vertically and alternate which side faces open. Stack them securely, using a small amount of wood glue or L-brackets on the back if you want extra stability.
Each open crate becomes its own dedicated plant compartment. You end up with a multi-level, multi-pot display that fills a corner with height, texture, and greenery.
Paint options are wide open: chalk white, navy, sage, terracotta, or natural wood — all work well depending on your existing color scheme.
5. The DIY Macramé Plant Hanger
Macramé plant hangers require no woodworking, no tools, and no budget to speak of — just cotton rope and an hour of your time.
Search for a beginner tutorial showing how to tie a basic square knot hanger. Four cords, a few basic knots repeated in a pattern, and a ceiling hook are all you need.
The finished product lets your plant hang in mid-air, freeing up floor and shelf space while adding warmth and handmade texture to the room. Particularly effective for trailing plants like pothos, tradescantia, or string of hearts.
6. The Simple Cinder Block Pedestal
Pick up a single concrete cinder block at any hardware store or masonry supplier.
Give it two coats of matte spray paint — black, terracotta, and off-white all look sharp. Let cure completely.
Set your potted plant directly on the flat top surface.
The appeal here is the intentional contrast between rough and refined — the raw industrial texture of concrete beneath something lush and living. Interior designers deliberately pair hard and soft, rough and smooth, industrial and organic to create visual tension. This accomplishes exactly that, for under three dollars total.
7. The Propped Ladder Plant Rack
If you have access to an old wooden ladder — garage, attic, estate sale — you have a ready-made multi-tier plant display.
Lean it against a wall at a slight angle. Each rung holds a pot. Vary the plant sizes to use the full height range of the rungs.
No old ladder available? Build one: two 1×3 boards cut to length, connected by four or five shorter wood dowels. Drill pilot holes, apply wood glue, drive screws through the uprights into the dowel ends, and you’re done.
The result is a tall, narrow display that works in spaces where width is limited but height is available.
8. The Flipped Tomato Cage Stand
Buy a wire tomato cage from any garden center — they’re cheap and universally available.
Turn it upside down. The wide ring that was originally at the top now forms a stable base at the bottom. The narrow ring that was near the ground is now at the top, where your pot will rest.
Spray paint the whole structure — matte black and gold both look excellent — and allow to dry fully.
The result is an open wire plant stand with a sculptural, industrial quality that looks considered and unexpected. It’s consistently a conversation-starter piece.
9. The Wrapped Tin Can Planter
This project uses materials you already have or can get free.
Save a large tin can from food recycling. Starting at the base, run a thin line of hot glue along the tin and press jute twine firmly into it. Continue in tight rows up to the rim, gluing as you go.
The natural fiber creates a warm, earthy texture that transforms a tin can into something that looks genuinely artisan. Make three sizes and display as a group — the cluster effect is far more striking than any single piece alone.
10. The Feature Wall Plant Shelf
Choose one wall in your home that needs visual interest. Mount a single floating shelf at eye level.
Place one well-chosen plant on it. Nothing else.
The single-item display forces the plant into a feature role rather than a supporting one. Surrounded by empty wall space, it reads like an intentional art object rather than a pot that needed somewhere to go.
This approach works especially well in small rooms where the temptation is to cram things together — resisting that temptation is exactly what makes it look designed.
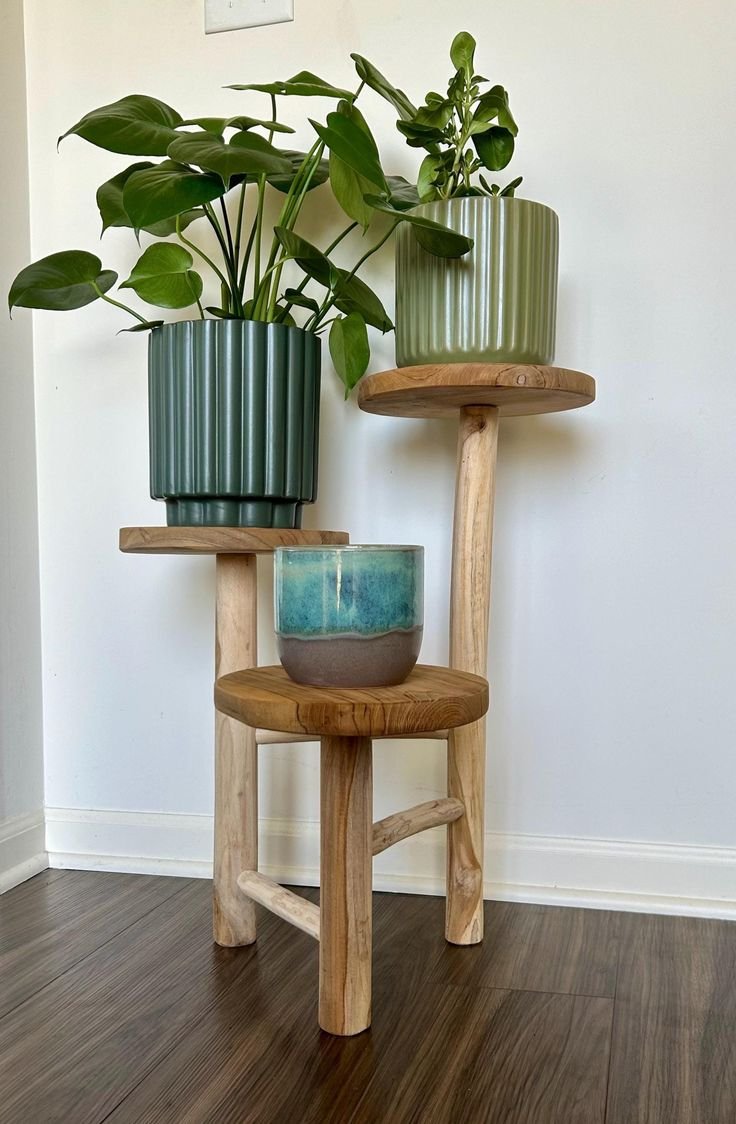
11. The Natural Wood Slab Stand
A thick cross-section cut from a tree trunk serves as the most organic and unique plant stand possible.
Sand the cut face through progressively finer grit sandpaper until smooth. Leave the natural bark on the circumference. Apply two coats of clear polyurethane to protect the top from water damage.
The finished piece is one of a kind in a literal sense — no other wood slice has identical grain patterns, dimensions, or bark texture. It’s the plant stand equivalent of a fingerprint.
12. The Adjustable Pegboard Plant Wall
Mount a pegboard panel to a wall using mounting spacers — these create the gap needed for hooks to fit properly.
Insert pegs and brackets in whatever configuration matches your current plant collection. Start with what you have; adjust and expand as needed.
The main advantage over fixed shelving is complete reconfigurability. Swap plants around, add new positions, or entirely rethink the layout — all without any new holes or permanent decisions.
It’s a display that grows alongside your collection without ever becoming obsolete.
13. The Converted Chair Planter
Look at that old chair in the corner — the one with the wobbly leg you keep meaning to fix.
Stop meaning to fix it. Give it a new job instead.
Remove the seat panel from the chair frame. Set a potted plant into the opening. Drape any trailing stems down over the legs and rungs.
The chair reads as something entirely different now — a sculptural object with personality — rather than a piece of damaged furniture. It’s a genuinely clever repurpose that consistently surprises people when they register what it is.
14. The Uniform PVC Pipe Stand Cluster
Using a pipe cutter or hacksaw, cut PVC pipe sections into five different heights.
Glue a small wood circle to the top of each pipe. Apply two coats of spray paint in a single color across everything — white, black, or a warm neutral all work well.
Arrange the stands in a tight cluster, mixing the heights: tallest toward the back, alternating shorter and taller toward the front.
Painted uniformly, the PVC disappears as a material and you see only a cohesive sculptural grouping. Grouped plants on varied-height stands is one of the most effective interior styling moves available.
15. The DIY Wire Frame Geometric Plant Holder
Purchase a length of thick-gauge craft or floral wire from a craft store. You’ll also need needle-nose pliers and wire cutters.
Bend the wire into a three-dimensional geometric shape. Cube frames and triangular prisms are the most beginner-friendly — they have clean right angles that are forgiving to shape.
Secure the intersections with thin wire or solder. Place your pot inside.
The geometric frame creates visual structure around the organic plant, functioning like a deliberate frame drawing attention to what’s inside. The open negative space makes it feel light rather than heavy despite its visual presence.
16. The Window Sill Extension Plant Shelf
Measure the interior width of your window frame. Order or cut a narrow shelf to fit cleanly across it. Mount using two small shelf brackets.
Line the shelf with small pots — succulents, herbs, or any compact plant that enjoys direct light.
Plants on a window shelf receive significantly more natural light than plants positioned even a short distance back from the glass — light intensity drops quickly with distance from windows. For light-hungry plants, this placement can meaningfully improve growth and health.
The visual bonus: your window becomes a living green frame, beautiful from inside and out.
17. The Plant-Friendly Rolling Cart
A three-tier rolling cart styled with plants solves several practical problems at once.
First, it holds multiple plants at staggered heights — creating natural visual variation. Second, it’s mobile — you can position it wherever the light is best and move it when light conditions change with the season or time of day. Third, it looks great.
Style each tier with a mix of pot materials — ceramic on top, terracotta in the middle, woven basket on the bottom — for a layered, curated look that doesn’t look like you tried too hard.
18. The Box Frame Wall Plant Mount
Build a simple open wooden box using four pieces of lumber and basic woodworking adhesive and nails. Paint or stain as preferred. Mount to the wall using appropriate picture-frame hardware or small angle brackets.
Place a small potted plant inside the box so it sits recessed within the frame.
The box creates a framing effect around the plant — similar to how a picture frame makes a painting feel more significant by creating a boundary between the art and the surrounding wall.
Install three in a row for a gallery-wall effect using living, growing material instead of prints or photographs.
19. The Stool-and-Basket Layered Stand
This display requires no building at all — just thoughtful combination of existing pieces.
Find a woven basket planter and a small wooden stool. Place the pot in the basket. Set the basket on the stool.
Three different materials at three different heights create a layered vignette with real visual depth. It reads as assembled-with-care rather than left-wherever-it-fit.
In interior styling, layering is one of the primary techniques used to create rooms that feel rich and considered rather than flat and sparse. This is that technique, applied in about thirty seconds.
20. The Hanging Tiered Basket Plant Display
A tiered hanging wire basket set — the kind sold for kitchen produce storage — makes an excellent hanging plant display when loaded with small plants instead of fruit.
Hang near a window. Each tier receives light, and trailing plants can spill between levels for a cascading, lush effect.
The practical appeal is significant: this display claims ceiling space rather than floor, counter, or shelf space. In smaller homes and apartments where every horizontal surface is already working hard, the ceiling is genuinely underutilized real estate.
21. The Intentional Stacked Book Plant Base
Done carelessly, books as a plant stand look messy. Done deliberately, they look styled.
Choose hardcover books with spines in a coordinating color palette. Stack them squarely and evenly — all edges aligned. Place a waterproof saucer on top. Set your pot on the saucer.
This works beautifully in a study, reading room, or home office where books and plants naturally belong together. It’s a display that communicates something about the inhabitant — someone who values both growth and knowledge — in the way the best interior details always do.
The decisive factor: if it looks intentional, it is styled. If it looks accidental, it is just a plant sitting on books. Make the intention visible.
Why Scale Is the Most Important Styling Decision You’ll Make
Before you build anything, understand this: the stand itself matters far less than the relationship between the stand and the plant on top of it.
Get the scale wrong — large plant on tiny stand, or small plant on massive base — and even the most beautifully crafted stand will look off.
Visual weight should match. A dense, spreading monstera or fiddle leaf belongs on a solid, substantial base. A tiny succulent or air plant belongs on something light, delicate, and minimal.
When scale is right, your DIY stand looks like a considered design decision. When scale is off, it looks like something went wrong. This single consideration matters more than material, finish, or complexity of construction.
The Common Trap: Planning Everything, Building Nothing
There’s a pattern that happens with home improvement inspiration.
You find twenty-one great ideas. You save them all. You think about which ones would work in your space. You feel good about having found great options.
And then nothing happens.
Saving ideas is not the same as having done something with them.
The gap between inspiration and action is where most home improvement intentions go to live forever without materializing. You know your space. You can see which of these ideas would work. That knowledge is only useful if you actually follow through.
This weekend is the opportunity. The materials are inexpensive. The time required is short. The result is immediate.
Your Action Plan
Scroll back up right now and pick the one idea that felt most achievable.
Not the most ambitious — the most achievable.
Write down the two or three materials you’d need. Check what you already have. Get what you don’t this weekend.
Set aside one hour — not a whole day, just one hour — and build it.
Place your plant on it. Step back and look at your room.
You’ll notice a real difference. Not because the stand is expensive or complicated, but because you made something with purpose and placed it with intention — and that always shows.
Your plants have been waiting for this.
Your room has been waiting for this.
Time to make it happen.
Let’s go.