Disclosure : This post may contain affiliate links or paid partnerships. I may earn compensation if you click a link or make a purchase, at no additional cost to you. See my disclosure for more info.
You know that feeling when a room finally clicks?
When you walk in and everything just fits? When it feels calm and purposeful, like someone with good taste made every decision in here?
You want that for this room. The small one. The one with two kids, or the guest room that needs to work harder, or the apartment where the bedroom is also the everything.
You’re not sure bunk beds can be part of that vision. They feel practical but not exactly beautiful.
Here’s what changes that thinking: bunk beds, done right, are one of the most powerful small-space design decisions you can make. They consolidate the sleeping footprint and leave you with options you didn’t have before.
The key is knowing which options to take.
These 17 ideas give you exactly that. They cover every dimension of a well-considered bunk bed setup — storage, light, privacy, layout, personality — and they work in real homes, not just perfect-lighting photo shoots.
What Makes a Bunk Bed Room Actually Work
It comes down to this.
In any small room, the largest piece of furniture is setting the mood for everything else. In most bunk bed rooms, that piece is the bunk itself.
A bunk bed that looks like it was purchased without much thought makes the whole room feel unconsidered. A bunk bed that looks deliberate — with intention in its lighting, its textures, its relationship to the wall behind it — does the opposite.
Don’t work around the bunk. Work through it.
17 Ideas Worth Implementing
1. One Reading Light Per Bunk, No Exceptions
A wall-mounted reading sconce or a quality clip-on lamp for each sleeping level.
This establishes something important: each bunk is its own sovereign space. The person in it controls their own light, their own bedtime, their own quiet.
It also makes the bunk look inhabited and cared for in a way that an overhead ceiling light simply doesn’t.
2. Curtains That Give Privacy Without a Wall
Run tension rods along the front opening of each bunk and add fabric panels.
Each bunk now has a closeable entrance. Children stop disrupting each other. Guests stop feeling exposed. The room becomes a collection of private spaces that also happen to share a footprint.
Choose fabrics that pull from the room’s existing palette. Even a simple linen panel reads beautifully here.
3. Use the Back Wall as Part of the Design
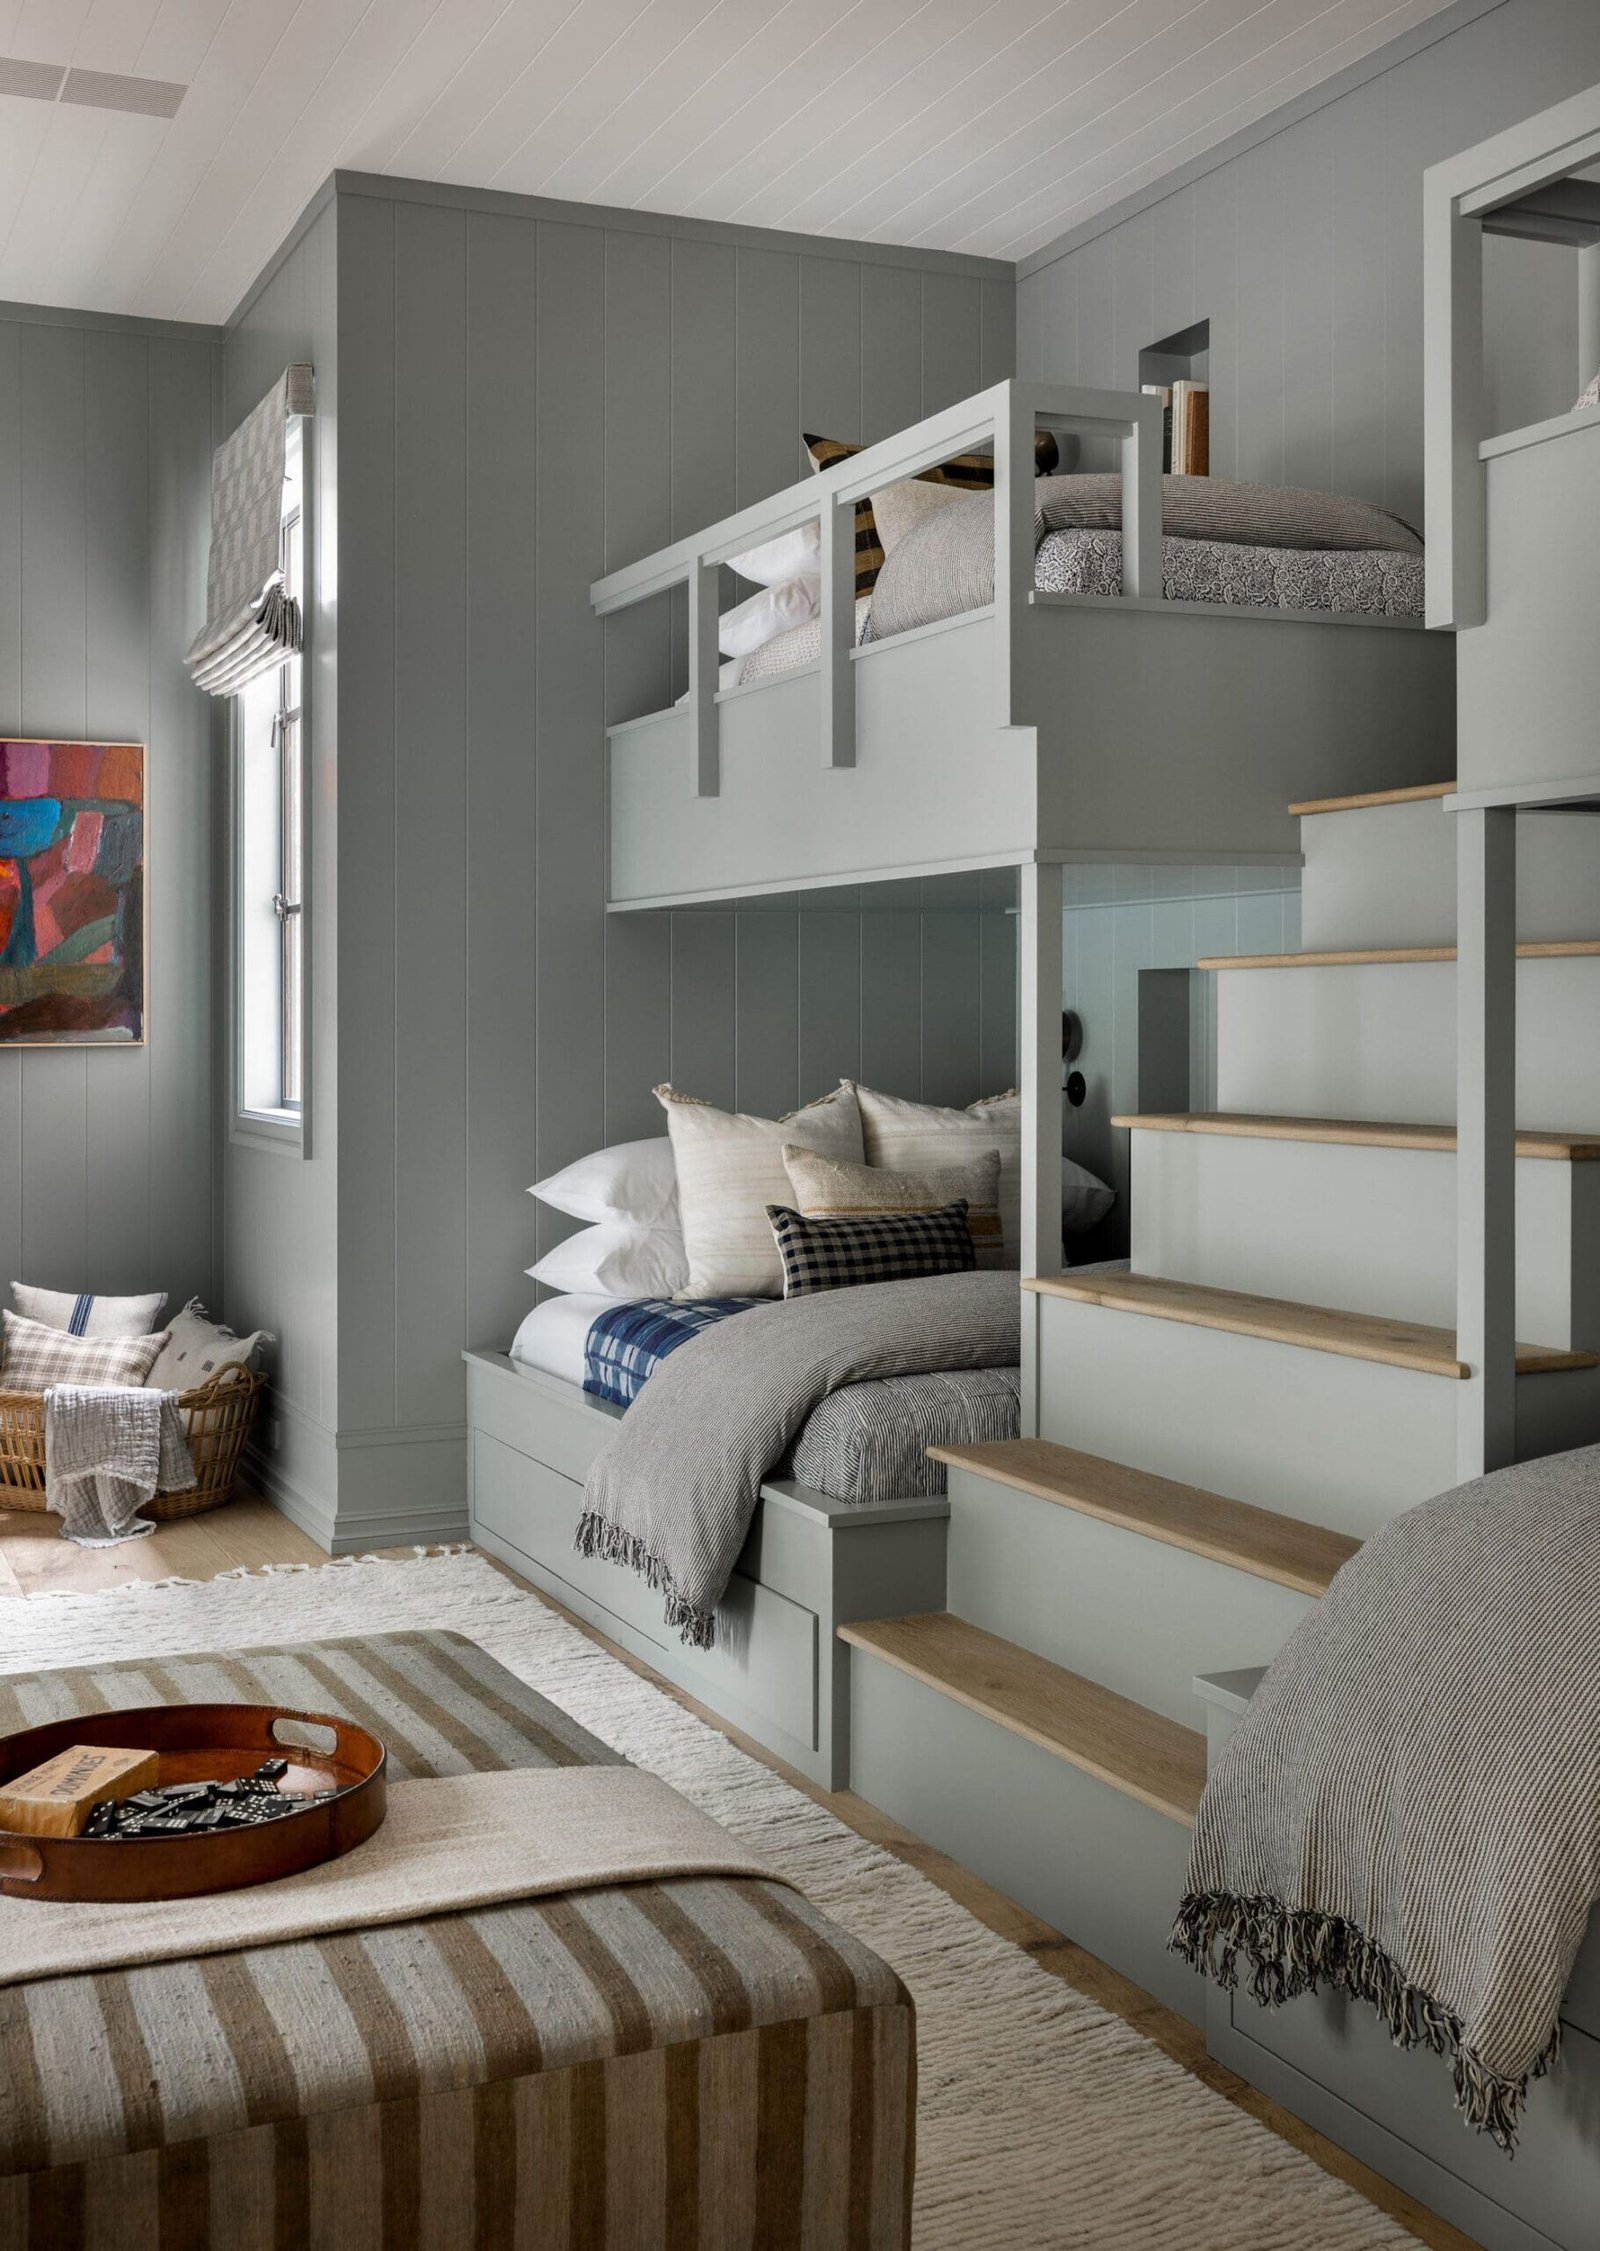
Paint the wall immediately behind the bunk bed in a rich, grounded color. Deep olive. Midnight blue. Warm espresso.
The bunk structure becomes the foreground to a deliberate backdrop. It looks considered. Composed.
If you do nothing else on this list, do this. The transformation is immediate and substantial.
4. Trade the Ladder for Stair Storage
A well-designed stair unit with integrated drawers turns access to the top bunk into a storage opportunity.
Every step holds something. Folded clothing. Art supplies. Books. Small toys. The floor stays clear because the storage is built into the climb.
This is the kind of decision that makes a room feel thought through, not just assembled.
5. Let the Bedding Unify Both Levels
Approach bunk bedding as a two-part system, not two independent choices.
Share a color family. Vary the pattern. One bunk in solid forest green, the other in a leaf-patterned print that includes that same green. When both levels speak the same visual language, the bunk reads as one piece of deliberate furniture.
6. Activate the Space Below the Lower Bunk
Slide a rolling trundle or under-bed storage unit beneath the lower bunk.
It’s a sleepover solution and a storage solution simultaneously. The kind of dual-purpose thinking that makes small rooms livable.
Models on casters are particularly good here — they pull out fully and tuck away completely without effort.
7. Label Each Bunk as Belonging to Someone
Place a personalized name sign or monogram above each bunk.
For children, this gesture matters more than it may seem. The room now tells them explicitly: this level is yours. That one belongs to your sibling. The territorial friction that often characterizes shared rooms noticeably softens.
It’s also genuinely sweet. A room that acknowledges its inhabitants feels more like a home.
8. Wall Shelves at Bunk Height
Install a floating shelf positioned within reach of each sleeping level.
Water, reading material, a small framed photo, a little plant — all the things that would normally require a nightstand now live on the wall. The floor stays clear. The room stays calm.
9. An L-Shape That Creates Space From a Corner
If your room has a workable corner, consider an L-shaped bunk layout.
The perpendicular orientation opens a pocket of floor space under the elevated bunk. That pocket becomes a desk, a reading nook, a soft storage area — whatever the room needs most.
The visual asymmetry it creates also makes the room feel more dynamic, less tunnel-like.
10. Interior Wallpaper for Each Bunk’s World
Line the inner walls of each bunk with a section of peel-and-stick wallpaper.
Each sleeper wakes up inside their own small world. A deep navy with gold stars. A soft floral. A graphic stripe. The choices can be as personal as the person sleeping there.
Because the paper is removable, this stays low-commitment and high-reward.
11. Soft LED Lighting Under the Top Frame
Adhere a strip of warm-white LED lights to the underside of the upper bunk.
The lower sleeping level gets a gentle, diffused glow. It’s ambient rather than directional — like the warm light under a canopy. Enough for reading. Enough for middle-of-the-night navigation. Not enough to disturb anyone.
12. A Slide That Makes Getting Up the Best Part
For younger children, a slide attached to the top bunk makes the room an adventure that happens to have sleeping in it.
Measure the floor space carefully before committing. Most designs are removable. Most children, once they have one, cannot imagine not having one.
13. The Under-Loft Study Zone
Raise the mattress level with a loft configuration and fit a full study setup below — desk, lamp, corkboard, shelf.
The bed floats above. The workspace occupies what was previously unused air. For a teen navigating schoolwork in a small room, this is nothing short of transformative.
14. Woven Storage on the Frame
Attach a hanging basket or woven wall organizer to the side rail of the upper bunk.
Small items find a home. The surface area on each bunk stays clear. And the material — natural fiber, rope, macramé — adds warmth to what might otherwise be a fairly cold, industrial structure.
15. Two Finishes, One Frame, More Depth
Paint the upper bunk a different color from the lower one, or choose a frame that already combines two materials or finishes.
A raw wood upper, painted lower combination looks especially strong. Or natural oak on top, matte charcoal on the bottom.
Thread something consistent through both levels — a shared hardware finish, a repeated bedding color — and the contrast reads as intentional design rather than indecision.
16. Drape a Canopy Over the Top Bunk
Suspend a lightweight fabric canopy from ceiling hooks above the upper sleeping level.
It makes the top bunk feel like the most private spot in the house. Enclosed, cozy, and just slightly elevated from everything else — literally and figuratively.
Children who get to sleep under one rarely complain about going to bed.
17. A Room-Wide Color Palette, Committed to Fully
Choose three colors. That’s the constraint.
Apply those three colors to the frame, the bedding, the wall, the shelves, and any accessories. No additions, no exceptions.
In a small room, palette discipline is what turns a collection of nice-enough pieces into a room that feels genuinely designed. The three-color limit isn’t restrictive — it’s what makes bold choices land instead of clash.
The Mistake That Cancels Everything
It happens constantly. And it’s so easy to avoid.
You install the bunk bed to save space. Then, because there’s suddenly more room on the floor, you fill it with a big dresser, a freestanding bookcase, and a bean bag chair that seemed like a good idea at the time.
The space you created is gone. The room is just as crowded as before, except now it has two beds and a bean bag.
Keep the floor. Let the built-in storage — stair drawers, floating shelves, trundles — handle the load. The open floor is the design goal, not the reward for filling everything else first.
The Room You Already Have
There’s a version of this room that’s already wonderful.
You don’t need to move. You don’t need to wait for more space. You need to make deliberate choices about the space you have right now.
That’s what these 17 ideas give you — a specific plan for a specific kind of room.
Start with one or two changes. Watch how the room responds. Add the next one.
Because the rooms that feel great don’t feel great because they’re large.
They feel great because every element in them was chosen.
Your room is waiting to be chosen.